Thekua is not just a sweet snack; it’s a taste of history, a staple of the sacred Chhath Puja, and a testament to the beauty of simple, wholesome ingredients. This classic recipe uses iron-rich jaggery (gur) to achieve that deep, earthy sweetness and signature golden color.
Get ready to transform simple wheat flour into crunchy, aromatic perfection that stays fresh for weeks!
🌟 Recipe Overview
| Feature | Detail |
| Preparation Time | 20 minutes |
| Resting Time | 10 minutes |
| Cooking Time | 30 minutes |
| Yields | Approximately 20-25 pieces |
| Cuisine | Bihari, Maithili, Awadhi (Eastern Indian/Nepalese) |
🛒 Ingredients You Will Need
For the Dough (Mooyan)
-
2 cups Whole Wheat Flour (Atta)
-
1 cup Jaggery (Gur), crushed or powdered
-
½ cup Water
-
4 Tbsp Ghee (Clarified Butter), melted (for the dough)
-
1 tsp Fennel Seeds (Saunf)
-
2 Tbsp Grated Dry Coconut (optional)
-
½ tsp Cardamom Powder (optional)
For Frying
-
Ghee or Vegetable Oil (for deep frying) – enough to fill the frying vessel.
📝 Step-by-Step Instructions
Phase 1: Preparing the Jaggery Syrup (Chaasni)
-
Dissolve the Jaggery: In a small saucepan, combine the 1 cup of crushed jaggery with ½ cup of water.
-
Heat Gently: Place the pan over low heat. Stir continuously until the jaggery is completely dissolved. Do not boil or form a thick syrup; you only need the jaggery to melt into a thin liquid.
-
Cool: Remove the pan from the heat and allow the jaggery water to cool down completely to room temperature. This step is crucial; hot water can make the dough soft.
Phase 2: Making the Dough (Gundhna)
-
Combine Dry Ingredients: In a wide mixing bowl, add the whole wheat flour, fennel seeds, grated coconut, and cardamom powder. Mix well.
-
The Mooyan (Mixing the Fat): Pour in the 4 tablespoons of melted ghee. Using your fingertips, rub the ghee into the flour mixture until it resembles coarse breadcrumbs and is thoroughly incorporated. When you press a small portion in your fist, it should hold its shape.
-
Knead with Jaggery Water: Gradually add the cooled jaggery water to the flour mixture. Mix with light hands; do not knead vigorously. The goal is to bring the flour together into a very stiff, firm, and slightly coarse dough. You might not need all the water.
💡 Pro Tip: A stiff dough prevents the Suji Thekua from absorbing too much oil while frying, ensuring its signature crunch and long shelf life.
-
Rest: Cover the dough with a cloth and let it rest for 10 minutes.
Phase 3: Shaping and Designing (Saancha)
-
Divide: Divide the stiff dough into small, equal-sized portions (about the size of a lemon).
-
Shape: Take one portion and roll it between your palms to form a smooth ball.
-
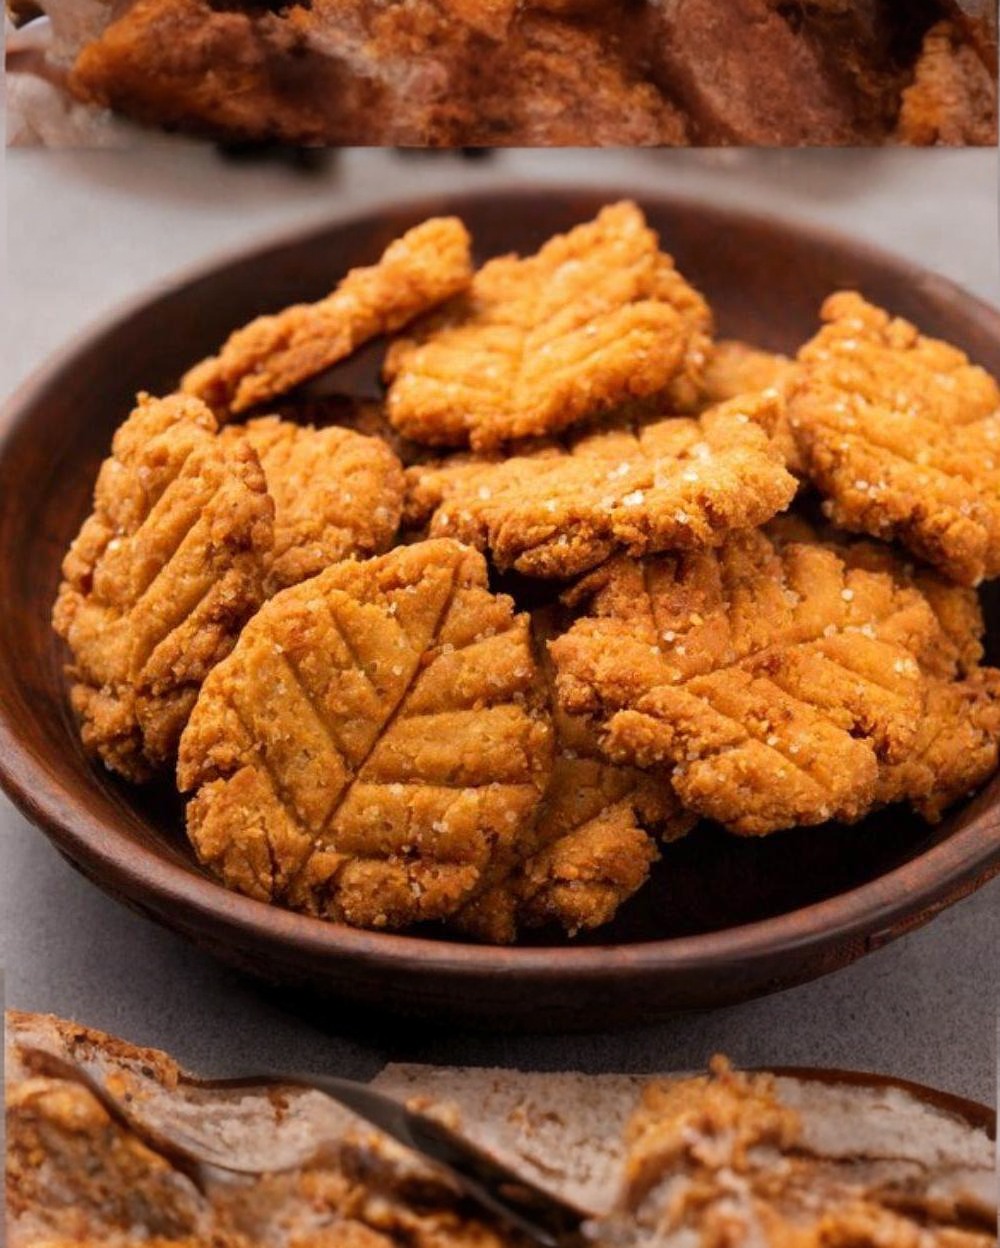
Design (The Classic Way):
-
Using a Thekua Mould (Saancha): Press the dough ball firmly onto the oiled mould. Flatten it with your palm to get the intricate pattern stamped onto the surface. Carefully peel it off.
-
Using a Fork or Knife: Flatten the dough ball slightly with your palm. Use the tines of a fork to create parallel lines or the blunt side of a knife to make a crosshatch or floral pattern.
-
-
Keep Ready: Arrange the shaped Thekuas on a plate.
Phase 4: Frying to Golden Perfection
-
Heat the Oil/Ghee: Heat the oil or ghee for deep frying in a heavy-bottomed pan (Kadhai) over medium-low heat. The oil is ready when a small piece of dough dropped in rises slowly to the surface.
-
Fry in Batches: Gently slide 4-5 Thekuas into the hot oil. Do not overcrowd the pan.
-
The Slow Fry is Key: Fry them on a low to medium-low flame for about 6-8 minutes, turning them gently halfway through. This slow process cooks the inside thoroughly and maintains the crunch.
-
Achieve the Colour: Once they turn a rich reddish-golden brown on both sides, carefully remove them using a slotted spoon.
-
Drain: Place the fried Thekuas on paper towels to drain any excess oil.
🍽️ Storage and Serving
-
Cool Completely: Allow the Thekuas to cool down completely. They will be slightly soft when they come out of the oil but will crisp up as they cool.
-
Store: Once cooled, transfer them to a clean, airtight container.
-
Enjoy: Thekua tastes better after a day or two and can be stored at room temperature for up to 3 weeks. Serve them as a festive offering, a travel snack, or with an evening cup of tea!